Thursday, May 31, 2018

Turbo on a Budget: 2004 Saab 9-5 Turbo


I went on Craigslist today and set the maximum price at $3,000 and searched for "turbo." Among hundreds of PT Losers that are selling for like $500 (do it if you like headaches and replacing timing belts), there are a few decent turbo cars that you can get. The one that really stuck out to me was a 2004 Saab 9-5 with no problems, 150k miles, and a turbo of course. It was also half the price I put the maximum at. Here is the interior.


In 2004, the 9-2 Aero is actually a Subaru WRX STi with a different body. Same engine, same car underneath everything. People didn't know this, however, so when the car came out, it was selling below sticker price at $18,000. I still remember to this day because it was an awesome deal.

Back to the 9-5. It has a turbo inline-4 engine that makes a very decent 228 ft. lbs of torque @ 1900 RPM meaning the power comes on quick. Horsepower is 220 @ 5500 RPM which is kind of weird but hey, Saab!

Thanks to the fact that this car is pretty unknown, it's cheap. If you can find a 9-2 Aero in the same price range, it's a better deal, but it's a different car. The 9-2 Aero is a sports car while the 9-5 is a nice sedan.

The interior in all Saabs is amazing. The company has a reputation for it that I can attest to. I had a 1996 900 SE Turbo that was the most ergonomic car I have ever driven. Everything was in the perfect place. Except the key which is in the middle. Pretty damn cool though!

It's kind of like... an airplane cockpit?

That car died at 292,000 miles. The alternator went out so I junked it. Can you say reliable? The 2004 9-5 is a different car, however, but it's probably not bad as long as you maintain it.

I'm gonna make this short and sweet. Do you want a unique car that's quick and can be made fast for cheap? Are you willing to deal with potential hassles associated with owning a Saab? There isn't many except for the fact that I think Saab is dead although I could be wrong considering I've been seeing the new 9-5 on the road.

These cars are very respectable. Everyone that has owned one has good things to say about them. If the Saab 9-5 turbo fits your style, get it!

Tuesday, May 29, 2018

LS400 Update: I See the Light

This website started as a blog about my Lexus and turned into a place for automotive articles. The car is, however, still the reason for it being and I want you guys to learn from me.

I've mentioned this before but part of the reason I bought this black 1995 Lexus LS400 is to become a decent mechanic. It had just been in a mild crash and needed some other things. Some time more than a year later, this is what I have replaced, both to get the car running and when the car had problems. I've also become much more proficient at working on cars. I find myself able to diagnose problems on my own now - something I will get to in a minute.


The list as far as I can remember:
-New radiator
-New alternator
-New power steering pump
-Plugged the ACV part of the power steering system (was leaking fluid)
-Changed the Coolant Temperature Sensor and the Engine Temperature Sender (a separate sensor only for the temp gauge on the dash)
-Oil change (recently I ran some Marvel Mystery Oil and changed the oil again)
-Changed rear brake pads and rotors
-Changed front brake pads; rotors had just been changed
-Replaced the damaged hood; I am holding on to a new hinge which I need to change out so the hood sits properly. I also have the radiator support. When I do this job, I am going to replace both hinges and the currently-bent radiator support so that the hood sits right
-Replaced headlights
-Restored interior; still have more plans but I changed out the chipped panels, got seat covers, generally made the interior nice and clean which it was not before. Did some of my own upholstery and used a wrap in certain areas as well as other products. It changed the whole feel of the interior.
-Changed spark plugs which were the original ones. I did this at about 220,000 miles. Which brings me to the state of the car now.

I was merrily driving a week ago when all of a sudden, I lost what seemed like 85% power as I was taking a turn. The motor was running like crap and the car was barely responding to the throttle. I initially thought I might have a clogged catalytic converter but after doing a back pressure test and having my mechanic look around, I eventually found the problem... Kind of.

The only thing he told me is that it seems like no one had ever even done a tune-up on this thing. He was right considering the original spark plugs. The timing belt and water pump have to be replaced as soon as possible but he was never able to find the actual problem that was causing my car to drive like this.

The first thing I did is change the spark plugs and that was enough to get a SIGNIFICANT amount of power back. The motor still ran like crap but I was able to accelerate into traffic without having my hazards on. Before this, the car wasn't even safe to drive on the road.


Next, even though you should buy them new, I found a new set of spark plug wires and distributor rotor cap at the junkyard. I tested the resistance and it was 1.1 ohms across the board while the ones I was running each had 5-11 ohms of resistance. Needless to say, this brought some more power back.

Now I was getting a check engine light that was saying my O2 sensor - bank 1, sensor 1 - was bad. I had it changed out but the code and problems persisted. The car will throw this code when it's running rich so I started trying to figure that out.

Because my throttle response was so bad and hit-or-miss, I replaced the Throttle Position Sensor which actually helped quite a bit. When I did this, the car actually threw a different code ONE time - p0150 or O2 sensor bank 1, sensor 2.

Being poor, I've been driving it like this, slowly restoring the thing, for almost three months now. I had a can of Marvel Mystery Oil (MMO) sitting around and it says it increases compression among other things so I decided to try it after researching it.

What it is is a detergent. It breaks down the sludge and cleans your engine. When you put it in your gas, it will clean the fuel injectors. I've tried Lucas Fuel Injector Cleaner with no luck but a few ounces of MMO actually made an immediate difference. Now knowing it works, I put it in the oil. After putting it in the gas, I could actually hear what I think was noisy lifters at idle. This is something the product eliminates aswell and sure enough, not only did it get rid of the sound but it made my engine run SO much better. The throttle response is much better too. The car drives almost like it has no problems as long as you drive with traffic (trying to go fast is a no-go... The loss of power and throttle response is ridiculous right now).

If you put it in your oil, you have to change it within 500 miles.


So where is the car at now? The motor is clean and strong but something is throwing it off. At this point, I've replaced fuel lines and vacuum lines, replaced sensors, and done so much to try to fix this that I inadvertently did an amazing tune-up on the car and I'm down to only one thing I can think of: the Mass Air Flow Sensor (MAF). It's so simply that I overlooked it. There was two cars at the junkyard with this part that are no longer there now that I realized duh, it's probably the simplest thing: the MAF sensor.

I have one coming in the mail and I am praying it fixes the problem so I can go ahead and change the timing belt. I'm also extremely tired of having to play with the pedal to go anywhere fast. The symptoms of a bad MAF sensor read like my problems: engine may run rich (yep), loss of throttle response (yes sir), poor fuel economy (12mpg is not fun), and a confused ECU.

I've spent much more than this car is worth and each penny was worth it. This has happened before - where the car wasn't running right - and driving it after I fixed it was amazing. I love this vehicle completely. When it runs well, every minute of stress and every dollar is worth it to me.


When I replace the timing belt and water pump, I will have an extremely reliable, badass vehicle. That is why this is all worth it. It is one of my all-time favorite cars and always puts a smile on my face. It doesn't matter that this car is selling for dirt cheap right now - it's the car I would want anyway. If it was brand new or from the 80s, I would want it anyway. I don't ever plan on selling this vehicle and if you're shopping for a car or even looking for a project car, check out the LS400. Just ask the seller if the timing belt has been done.


Tuesday, May 22, 2018

Tutorial: Make Custom Seat Covers + Bench Seat in LS400

Some of you may know that this car came with the most ripped up seats I have seen in a long time. I had to do something about it. Simply installing Dickies seat covers helped a LOT but the ones for the back seat really suck so I made my own and turned my back seat into a bench seat.


You will need:
-Enough leather. I will explain how to get it for free but you can buy it if you want a certain look. You can use cloth and other fabrics too.
-Sewing needle(s)
-Fishing line or strong string. Otherwise it will quickly rip.
-Scissors or a needle.
-A ruler or something flat to mark where to cut. You need this to draw straight lines where you're gonna cut.
-Marker or pen to mark your fabric.
-Optional: 3M Vinyl adhesive

You might be thinking how this fits into a budget build when leather costs so much. Well actually, it's free. You read that correctly.

The leather I got is strong, clean, and smells good. It is very good quality. Where do you get it? Drive around on trash day and look for couches. I cut all of the leather off using a razorblade and left the frame. Cut the pieces as big as you can - you can always trim them later. Take the whole back piece as one piece. Same thing with each cushion and so on. One couch is basically enough for one back seat. I found a wallet with $7 in it too!

You might be wondering why I only did the back of my back seat in leather. That was on purpose. The bottom is the old seat cover. I turned the seat into an old school style bench seat and I think the two-texture is very original. I will be redoing the center console and some other things so it flows with the rest of the car but let me tell you, I am so glad I went ahead and made this thing. I am very busy so I would make some progress, stop, go back, etc. In total, I think I spent about four hours. It's actually relaxing.

I made the seat a bench seat for the same reason I am keeping the leather/cloth combo - originality. Of course, the LS400 has nice seats and the center armrest is no longer accessible. However I just really like the thought of a bench seat in the back. I suppose that's what makes your car yours.

The first thing you're gonna want to do is simply lay your pieces of leather on top of the seat and measure where you're going to cut them. You need to trim off the edges so your pieces are perfectly squared.

You need to decide if you're gonna use two or three pieces. If you use two, you need two wide AND long enough pieces. Put em on and see if they meet in the middle.

For my three-piece design, this is how I mocked up the side pieces to see how much I need in the middle.

It will save you time but I think a three-piece looks better but that's just my opinion. That's what I did. In this case, measure and cut the two side pieces, mock them up, and again, mark where the middle pieces are going to be cut.


If your leather already has stitching, be mindful to connect the pieces in a way where these lines flow. Again - look at the first picture and notice how there is stitching going across the whole top of the seat. It's details like that that will set your car apart.

In order to sew these pieces together in a way that looks good, the stitching needs to be done in a certain way. You don't put them next to each other and start sewing. This will create ugly lines. You want the edges of the leather to be folded into the back-side of the cover so you can't see the ''edge." I hope that makes sense. Lay them down like this:

Lay the first piece down with the leather part facing up. Lay the piece you're going to attach on top of it but upside-down. The leather faces should meet. This way, when you line them up and sew them together, you will have a nice hidden stitch. Again, the edges will fold in on each other. Look at how it's done in your car originally to see what I mean or look at the picture below.

Again, line the pieces up perfectly so you can get a nice stitch. Optionally, you can put down a small film of 3M adhesive to give it extra strength where it connects. If you're gonna do this, put the adhesive on the edge of one piece, put the other one on top (be conscious of which way it's facing!), and let it dry before you sew. This will help to hold it together straight while you sew aswell.

Here you can see the 'folded in' part I was talking about as well as how you should line up your pieces - perfectly straight on top of each other. In this picture, I am connecting the middle piece to a side piece.

It's time to start sewing. Don't be intimidated if you have never done it before because it's simple. You put your string through the hole in the needle, pull it through some so it doesn't come out of the needle as you push it through each hole, and begin by pushing the needle through two pieces that you should have sitting on top of each other (be mindful to lay them down correctly because otherwise you may pick up your finished piece only to realize that you sewed the pieces the wrong way and you are looking at the back of the leather on one of them).

There's two ways you can sew this together:
1. Use a straight needle. Push it through from top to bottom, then push it back up from bottom to top a short distance away. Continue until finished.
2. The faster method. Bend a needle so it's a half-circle. This will let you literally hook the string under so you come back up with two holes as opposed to having to insert the needle from the bottom if you are using a straight one.

When you first start, make the first hole and pull your string almost all the way through. On the back side of the leather, you need to tie maybe five knots on top of each other so the string stays there and doesn't pop out. The knot will prevent it from going through the hole the needle makes. You need to do this at the end as well. You don't want your stitching coming out because you didn't knot it.

The first thing you need to do is sew together the outside parts that are going to hold the cover in place.

Line it up straight using some tape and sew away. 

You will fold the sides that are going to be tucked in behind the seat and sew them in a way where you can put something in there that will keep them from easily coming out. The idea is that you want something maybe the thickness of a pencil there so that when you push that in the space where the seat ends, it will keep the seat cover in place. That's actually how most seat covers that you can buy work.

Tucking it in. The pieces you should have sewn into these parts will help hold it in place.

Once all that is done, you need to connect all of the pieces. Each piece needs the folded over part that I just explained in the areas where it will be tucked in. Don't worry about the bottom - you're just sticking all that extra leather in between the seat (so cut it a foot longer than you need to cover the seat).


You can do the bottom part the exact same way.

As always, feel free to leave a comment if you have any questions. I will be more than happy to answer them.

If you have skills, you can do two or three stitches at once with a bent needle. 

This is how I laid down my leather in order to put some adhesive all along the edge. Having it already lined up and close will avoid making a big mess and will help with lining the two pieces up. You simply lift it a little bit and bring it to the edge of the piece with the adhesive and lay it down straight. Put some heavy things all along the edge to press the pieces together.

Line up any stitching.
K

Thursday, May 17, 2018

Doing a Basic Tune-up on Your Car

It is important to occasionally do a tune-up on your car, especially if it's old. If it has never had one done, you will see very good results. You can expect horsepower and torque to come back along with some better fuel economy.

Every engine has basically the same parts that wear out and are critical to the operation of the engine. These include spark plugs, spark plug wires, and a distributor or distributor rotors and caps. Also included on this list are sensors. Depending on your car, one single sensor can make a huge difference. On an LS400, a Coolant Temperature Sensor that is bad will cause a loss of throttle response and a good 20-30hp! That's pretty extreme but other important sensors are the Throttle Position Sensor (TPS), Idle Air Control Valve (IACV), Crankshaft and Camshaft Position Sensors, and Oxygen Sensors (you should get a code if one of these goes bad). All of these send information to the ECU and so fixing bad ones will typically restore lost power, throttle response, fuel economy, and even shifting if your transmission is automatic.

I want to explain how to do these things aswell so you can actually do it on your car. If you use a mix of junkyard and store bought parts, you should be done for under $200.

Spark plugs should be changed every 100,000 miles or so. They develop carbon deposits, causing a bad spark. You will see this on old spark plugs as a layer of black carbon on the metal parts that create the spark.


Whatever your engine is, you will have to get to the point where you can unplug the spark plug wires so you can access the spark plugs. I would change them one at a time. This way, you can unplug one wire, change that spark plug out, plug the wire back in, and move on to the next. You won't lose track of which wire goes where this way. You should also lay them out in order so if you see something like oil on one, you know which cylinder it is (one of mine had oil on it but it didn't mean anything except that the old spark plug probably wasn't firing correctly).

There is a specific way to tighten the new spark plugs. You untighten them like anything else using a spark plug tool or a socket with a long extension. When you put the new one in, however, you want to tighten it to the following specifications:

Tightening Spark Plugs: Turn it until it's tight enough to where it first rests near the bottom of the thread. This is called "hand-tight" but that term can be misleading. Basically, you should feel it hit bottom - you will suddenly need significantly more force to turn it. It is at this point that you turn it HALF of a turn more. That is perfect tightness.

I do my wires separate mainly because it's easier to keep track of which is which. You should typically buy new ones but you can also get good ones from the junkyard. What I did was test the resistance of mine (5-12 ohms) and of the sets of junkyard wires I was looking at (1.1 ohms, all of them). That test at least let me know there is proper resistance and with the fact that they looked new, it was a good indication they were new. And they worked very well. This can save you $60-80.


When you take the wires, lay them out in order. Decide which cylinder is 1, 2, 3, etc. For my V8, passenger side bank was 1-4 starting from the firewall and the driver side bank was 5-8, again from the firewall. At the junkyard, I marked them with dots (4 dots for 4 or 8) and laid them out in two piles corresponding to the two banks. I used the clips that were there to clip them together aswell.

When you start changing them, just do it one at a time. Sometimes pulling the plugs that attach to the spark plugs can be a pain if they've been sitting for a long time. Just go side to side, don't pull TOO hard (although you are changing them...), and use a screwdriver to push the rubber boot off the cylinder while you pull if you have to. Doing the wires one at a time this way prevents you from mistaking wires. Take off one old wire, put on the corresponding new wire, go to the next.

One other thing you need to change while you're doing your spark plug wires is the coil pack. This is what feeds the appropriate amount of electricity to each wire. A bad coil pack will certainly make your motor run rough. The timing may be off along with power and throttle response.  I would recommend going to the junkyard for one and trying to find the newest looking one you can unless the coil pack is only $20-30 more new, in which case just get that. I believe I saved almost $100 by using one from the junkyard.

Just be careful not to get a really old one. Look for what effect the elements have had on it. If it looks new, it's probably relatively new. I know that comparing my old one to the one I got is a big difference. My old one was faded. Of course, this isn't a surefire way of knowing that the coil pack is good but it's a safe bet and it's still cheaper even to get a second one from the junkyard. I said this before but get a new one if it's only a little more.

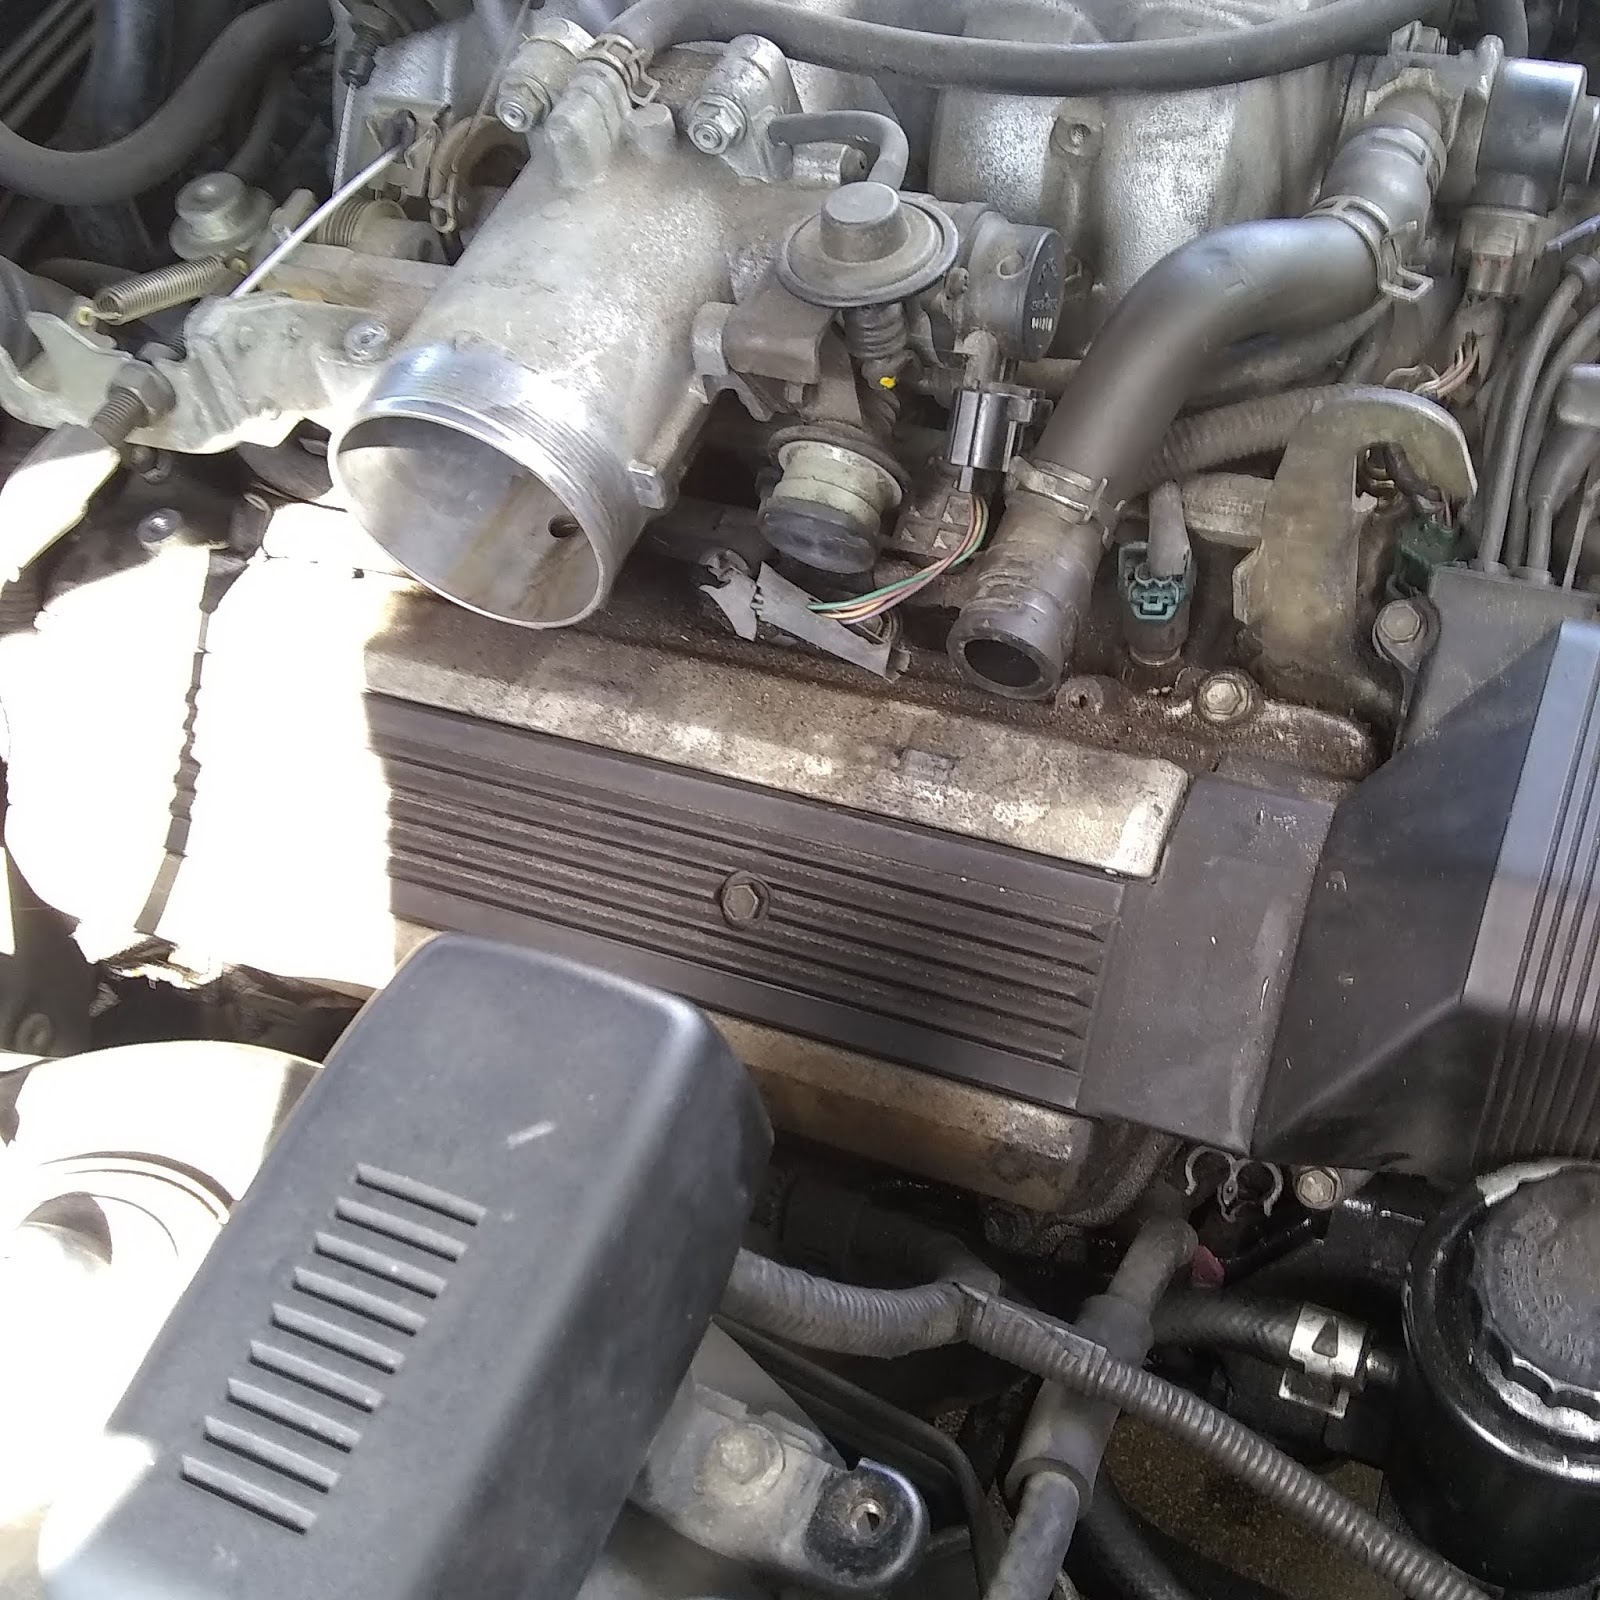
Dirty EGR Valve.

One of the things you NEED to change if your temp gauge isn't working in your dashboard is either the Coolant Temperature Sensor or Engine Temperature Sender depending on your car. Some cars use the info from the former for the gauge while others (like my Lexus LS400) have a separate sender. They're right next to each other. I mention this because it is extremely important to be able to see your engine temperature because you can easily blow a head gasket if it overheats. Also, like I mentioned, the Coolant Temperature Sensor will bring back some power in most cars because it sends information to the ECU so if you have a bad sender aswell, change them both.

If you have weak throttle response, meaning your engine is slow to respond when you push the gas pedal, you might want to look at the Throttle Position Sensor (TPS). If yours is old, replacing this part should make your car more responsive.

The EGR Pipe recycles exhaust gas and sends it back to the engine. If yours is cracked or the valve is stuck, your car will get bad fuel economy and probably run bad aswell. If it's just the valve (pray), you can take it off the car and clean all the deposits with a carb/throttle body cleaner. If your car is old, it's good to clean this anyway so that you don't have problems in the future.

Another important component that you can clean is the Idle Air Control Valve or IACV. When this one goes bad or doesn't function properly, your car will have a rough idle and maybe even stall out.

You need to check the slack on your throttle cable. One reason a car develops bad throttle response is a sagging throttle cable. It has to be taut but not slack and not tight either. If you can move it up and down significantly with your finger, it needs to be tightened. You should be able to press it down a little. I think all cars actually have specifications on how tight the cable should really be but if you tightened it like I said, it will be fine. Push on it gently.

To tighten the cable, most cars have a setup where you can adjust it by turning two nuts. The nuts sit next to each other, tightened against one another, usually with some sort of thin metal in between. What you do to adjust the cable is loosen the nuts by using two wrenches; you will be holding one in place while you turn the other one to loosen it with your other hand. Usually as soon as you loosen it, you should be able to twist both nuts either way with your fingers. If the throttle cable is on the left, you need to turn the nuts towards the left, moving the contraption to the right and tighening the cable as it moves. It is actually quite self-explanatory when you look at it. The contraption has a thread that these nuts sit on and allow you to tighten it at any point. When you get it where you want it, bring both nuts to the metal part that sits between them and tighten them together with your fingers first and finish with the wrenches.

I shouldn't have to mention this but you should check your fluids. Change your oil if it's extremely dark and make sure you have proper coolant. There's something in particular that reminded me of this - my roommate's Mustang. The coolant in that thing, if you can call it that, is orange because it's just water with a whole lot of rust. Kids, get the coolant specified for your car by its maker. It's important not to let anything that has to do with your engine rust and your radiator will be able to cool the engine better.

If your transmission fluid doesn't smell burnt, you should be okay. Maybe think about changing it at 200-250k miles as it's supposed to be a lifetime thing but it does go bad eventually.

Dirty engine bay.

I recommend you take the time to clean your engine if you're taking off a lot of covers or parts and can get to the hard-to-reach places. It just looks better and might help keeping it cool, even, although that's if your engine is covered in oil... Also, if your engine is completely clean and you get a leak, then it is much easier to find because you should be able to see whatever it is that's leaking without confusing it for all the other liquids that have accumulated. 

Clean engine bay. (Mine will be like this next year...)

One of the last things I can think of is obvious: your brakes. Check that the car doesn't pull to one side when you brake hard (that's a sticking caliper) and make sure your brakes and tires are good.

If I missed something, please leave a comment and get to wrenching!

Friday, May 4, 2018

Turning a Bad Interior to Respectable for About $100

When I bought my LS400, the interior was really bad. Among a bunch of small things like panels popping out, the seats were torn to crap. I always say it looks like a dog owned it. So many rips!

It was time to re-do the interior and not spend too much money on it. I wish I had a picture but the original interior had brown floormatts, a woodgrain and brown center console, and torn seats. The actual back of the back seat wasn't torn much, thankfully, allowing me to do some creative use of seat covers. The center console was ripped up along with the majority of the seats.


As you can see, my car now rocks a brown and black interior. It looks much better in my opinion. This seat cover actually covers the top but I had the great idea to tuck it because the top part is horrible. It constantly comes off and you can neither lower the center armrest nor put your seatbelts on without taking off a part of the cover.

I used the following things to re-do the interior:
1. Vinyl Paint - $15
2. Seat Covers - $50
3. Flat Black Wrap - $25
4. Steering Wheel Cover - $20
5. Leather for Shifter - $0 (taken from trashed couch)
6. Two New Woodgrain Front Window Button Panels - $25


I used the wrap to change the look of the center console. The clear layer on the woodgrain was starting to fade and wasn't looking too good so I turned it flat black and it made a huge difference in how the car feels. I decided to leave the center ashtray original because I replaced the other woodgrain panels.

I actually used the cloth from a sweater to reupholster the part that opens because that gave it cushion. I really love the way it feels. It was supposed to be a test and ended up working out great.

There's a tutorial on this website but I essentially unscrewed the plastic piece that attaches to it to tuck the new fabric in. I left the old leather but it was torn up too. I had to do this because I had never seen such a ripped up interior! In the future, I plan on just getting new seats but I do want to customize some things - the door and dash come to mind. Suede anyone? But that will run you more than the $100 we have planned.


Next step - cleaning the inside of my windows. I would like to hear any ideas when it comes to customizing your interior. There's a couple things I want to do, as I mentioned, but you will have to wait.

Tip: If you do this to a car you're trying to flip, it will surely raise the value if the interior is bad.

Saturday, April 21, 2018

Rally and Autocross on a Budget

One of the best activities that I ever involved myself in was rallycross and autocross, the first of which was my focus. Out of the two, it's probably a little more expensive as far as wear and tear on your car but also more fun in my opinion. So what are these events?

Well, it's a racing event. It is set up in time-attack style where everyone runs their lap solo. Based on the event and how many drivers show up, you should be able to run about 6-8 laps, more or less. The drivers are competing with everyone else there so the lineup can be varied enough to feature a modded STi, an old Ford Thunderbird, and a BMW 325iX - on a dirt course. Rallycross takes place on dirt while autocross takes place on asphalt. The two are very different.

Autocross seems to be the more popular one. The maintenance on your car ends up being cheaper because you're not racing on harsh dirt roads. The cars that people race in these events differ. For example, light all-wheel drive or front wheel drive cars are preferred for rally. In autocross, anything goes but of course you can actually get enough traction to compete with rear wheel drive cars.

As I mentioned, you get a varied field. You can bring whatever car you want as long as it passes a simple safety inspection so you will typically see some cars that are much faster than others but the thing is - you do this for fun. While some events may pay out a small amount of cash for a "podium" (there is no podium) finish, usually you only get a trophy. People at these events just want to test themselves and their car or just have fun so everyone is very nice to each other.


You need to make sure your car is in good condition before you do either event. If something is on its way out, it WILL go out when you race the car. Make sure your suspension is good, your battery is secured, your liquids are full, and the maintenance is up to date. If you get a solid car, it's not hard to rally and/or rallycross a car pretty cheap. The main thing you will be going through is tires but things will also occasionally break although I didn't have many problems because I made sure the car was in good running condition.

For rallycross, great starting cars include Dodge Neons (they actually do very well on dirt), Mitsubishi Eclipse GSXs (you can find the first gen cheap sometimes and it's all wheel drive/turbo), Mitsubishi Lancers or older Evos. You can be competitive with these cars and bring home trophies. Look for cheap AWD or FWD cars that have cheap parts preferrably. Remember, you will probably be beating this car up so you can strip it for weight reduction. Get rid of the flooring, back seats, etc. You can even resell some of this stuff.

For autocross, you may be able to use your rallycross car. I had good luck going out on asphalt with a 1989 BMW 325iX (AWD) where I was beating new Mini Coopers. But if this is your choice and you are looking to buy a cheap car to do it with, I would try to find an older Mustang GT, a Mitsubishi Eclipse GSX (they're really fast with higher boost and weight reduction), a Miata, an MR2, or maybe even a 3000GT if it was in very good condition although those cars are very heavy.

Preparing your car is pretty straightforward. If it can make a trip across the US without any problems and nothing breaks when you floor it, then it should be fine to race. That's a good gauge to go by. Unfortunately, things WILL eventually break but that is part of this hobby. To give you an idea, if you're willing to be patient, this is how cheap I was able to get in.

After looking for a couple months for a good deal, I saw this BMW 325iX a couple towns away. The guy wanted $2,000 which was out of my budget but he was moving and he had to get rid of the car so I told him I would give him $900 if he hasn't sold it and wants to do that. Sure enough, I got a call a week later to pick it up.

This car was definitely maintained which was a big plus. It can suck $400 out of your wallet just doing a good tune up and bringing the car up to date with maintenance. I actually had nothing break for about five or six races. Granted, I was lucky because something should have probably broke. Expect to spend maybe $500 for six races. I had to buy dirt tires aswell which was the only other cost other than gas.

Similarly, I bought a two door Dodge Neon with the DOHC engine and raced that a few times with very good results. The 160hp is quite good in that light car. It doesn't do well on asphalt at all but for rally, it's a sound investment.

When you're ready, there's places online for whatever area you're in dedicated to letting you know where the races are so Google that. When you get to a race, you pay an entry fee ($25-50 usually) and your car has to pass a safety inspection. All they do is make sure your tires aren't bald and that your battery is secured in place. That's a big one. If your battery is moving around, find a way to secure it well.

Rallying and asphalt racing is an adrenaline filled, fun sport that is gaining more popularity - slowly albeit. Drifting has also grown to be huge, helping to spread the word of rally/autocross. If you have the resources, I recommend you do it. Don't worry, you won't get hurt (by the way, you need a helmet). Your car might...


Go to an event and just spectate. See if you would like to try it out. Once you see a huge plume of dust following a racing-spec Evo 9 that is screaming, hauling ass past you, I think you will make your decision then.

Saturday, April 7, 2018

My One Year Plus Experience with the LS400 - It's Been Amazing

As some of you may know, I bought this car crashed with about 220k miles on it. My acquaintance had driven it into something at a slow speed, damaging the grill, radiator, and hood. I gave him $250 for it planning on getting it running and flipping it.


It was no longer until I got it home - five minutes away - that I had fallen in love with the car and decided I was going to keep it. It was rear wheel drive, definitely had enough power for me, and was a beautiful luxury sedan - my personal choice of car.

To give you an idea of the condition it was in, let me put it this way. A month ago, I was driving and lost 85% power. I limped the car home and ended up finding out that the spark plugs were original. Remember, that's 220,000 miles on the same set of spark plugs. It's things like these that make me realize just how reliable this car is if it's been taken care of.


Mine definitely wasn't and I need to change the timing belt and water pump. I did a full tune-up after this last incident - new spark plugs, wires, and distributor rotor caps. The sound of the engine actually changed after this from a quiet V8 to one with a nice rumble! It was so drastic that I wondered at first if something is wrong. Maybe my exhaust? No, that's just how the engine is supposed to sound!

I had to change the original fuel filter aswell. That was actually the cause of my last problem. The engine was starving of fuel. If I gave it medium or more throttle, it would just bog down and barely accelerate. I had to baby it to get enough fuel to the engine.

The point I want to make with this article is just how durable this car is and how reliable it is. I also want to say that some people would think I'm stupid. I have easily spent another $2,000 on all of the parts I replaced since I've had this car. I changed out a good fifteen different things myself except the power steering pump which I paid someone else to install.

As far as I can remember, the following is a list of things I have done to bring life back to the car. This car was going to be junked and now it's being restored completely. It drives better than when I first got it and I am completely in love with it.

I did a lot to the interior aswell which I will show you later in this post.

The List:
-Power Steering Pump
-ACV Delete
-Changed out dry-rotted hoses
-Coolant Temp Sensor
-Engine Temp Sender (sends info to gauge)
-Hood; have to change hood hinge which I have
-Radiator; have to change out the radiator support which I have aswell
-Alternator
-Headlights
-All fluid change except transmission
-Front brake pads; also fixed a sticking caliper - rotors were new
-Rear brake pads and rotors
-Spark Plugs
-Spark Plug Wires; have distributor cap

The car is running good but it is way overdue for a timing belt change which I expect to be able to do soon. The passenger side hood hinge also needs to be changed. This is why the hood sits weird. Tie your hood down if it doesn't latch and you're going to drive! I thought I would be fine driving in the neighborhood just to test the car after I did something to it and a gust of wind caught the hood, sending it flying open to crack my windshield on my side and bend the hinge on the other side. Oh well, you live and you learn. It still makes me mad to this day - if not for a dumb mistake, the car would look okay! The average person looks at it and the first thing they thing is "Oh that car is f***ed up." I digress.

As far as my interior goes, I have it to where I really like it but it's far from what I want. When I first got the car, however, it looked extremely bad. Every seat was torn, the center console was torn, and it was just in bad condition.


The first thing I had to do was buy some seat covers. I went with black which goes real well with the tan interior. Next, I wrapped the original shifter in leather and stitched it myself. There is a tutorial for that on this website.

Next, I used vinyl paint to paint the floor matts black and I used an actual wrap to change the woodgrain in the center to a flat black. It was fading and didn't look right. I left the pop-out in the middle the same and replaced my old, breaking woodgrain panels that hold the power window buttons with new ones. I hung a pair of dice on the mirror with a cross aswell... Have to have the dice.

In today's money, the LS400 would cost $90,000 if it was new. You know the $3000 or so that I've spent on this car? What is that compared to $90k? The way I see this car is a little different from how people look at cars.

To most, a new car is a new car and an old car is on its way out and is probably not reliable. The reliability depends on the vehicle and the maintenance done to it but as far as the car being on its way out...

I'll put it this way. This is the car that I want. If the LS400 was $10k, I would still be working towards it. The fact that I got it so cheap just makes me feel really lucky.

Let me wrap that thought up. I bought a $90,000 car for $250, put another $2-3000 into it, and I'm a couple grand away from how I want it. And the best part? Most if not all of the components that have to be maintained or changed out, will be. This is as close as you can get to a new LS400.

I am keeping this car until I die if I can. I actually want my name engraved into the frame. It's actually a rebuilt title, bringing the value down more, so it's pointless for me to sell it anyway.

Guys and gals, if you have a dream car that sounds like this, set yourself a goal to get it.

One thing I have to talk about is that it was no cake-walk getting the car to this point. The reason was that it became my daily driver almost immediately and until recently, my wife was the only one working.

Intermittently, things would break and we would have to somehow come up with the money while living paycheck to paycheck in a hotel. There was a good 4-5 times that the car was dead (things like alternator, something had gotten in my throttle butterfly one time, etc.) and we would be forced to try to survive in a city where you need a car until we got it fixed. I was able to get it back on the road in less than a week every time.

Every time I had a problem, it was something minor (if you consider an alternator minor - I do, it's cheap to change yourself). There are no serious problems with either the motor or transmission and I'm hoping I get many more miles out of both. I think I will.

The plans for the future make me very excited. I am almost at "stage 1" of repairing the car. I gave myself goals which you should if you buy a car like this.

I want to get it to stage 1 of my build before I move on. What I wanted to do before stage 2, which includes modifying the looks to my tastes, is get the car running completely well. Like I said, it's almost there. Soon I will have the timing belt and water pump changed out and by that time, any other little sensors or anything that I may need to change out, I will.

I've been planning on fixing the hood hinge for months but other things kept popping up (no pun intended). I'm going to do it VERY soon and install hood pins which I think look badass.

A nice example of a VIP-style car, originating in Japan from the Yakuza who liked the big sedans because they were fast and comfortable.

VIP cars are my inspiration for this build. Those are lowered as much as possible and rock nice rims, possibly stanced. The interior looks like something that the CEO of Coca-Cola would hop into. This includes curtains on the windows and tables with cupholders for the passengers. The tables are kind of like the ones you get to use in airplanes.

I want to eventually have my interior black and the color? You will just have to wait and see.


This car will be show car status but daily driven. A new exhaust is in the books and I'm trying to get my hands on a few different things to customize the look aswell. Follow along if you are interested. When I get to stage 2, I will be giving you guys a breakdown of what I'm spending and definitely more tutorials.

I am in a much better position in life now so I am able to afford this stuff. I've also been very busy so I apologize for the late article.

If anyone wants a tutorial on changing the fuel filter on a 1995+ LS400, let me know. The ones I found are for 1990-94 which have the filter in a different position. It is located in front of the rear differential instead of above the splash guard. You need ramps or a good lift for this. Thanks for reading.

I Call it Blackhorse - My New Project Car

When I first got this Focus, if you have read the other articles, I hated it. The headlights looked weird and it was making tons of noises. ...